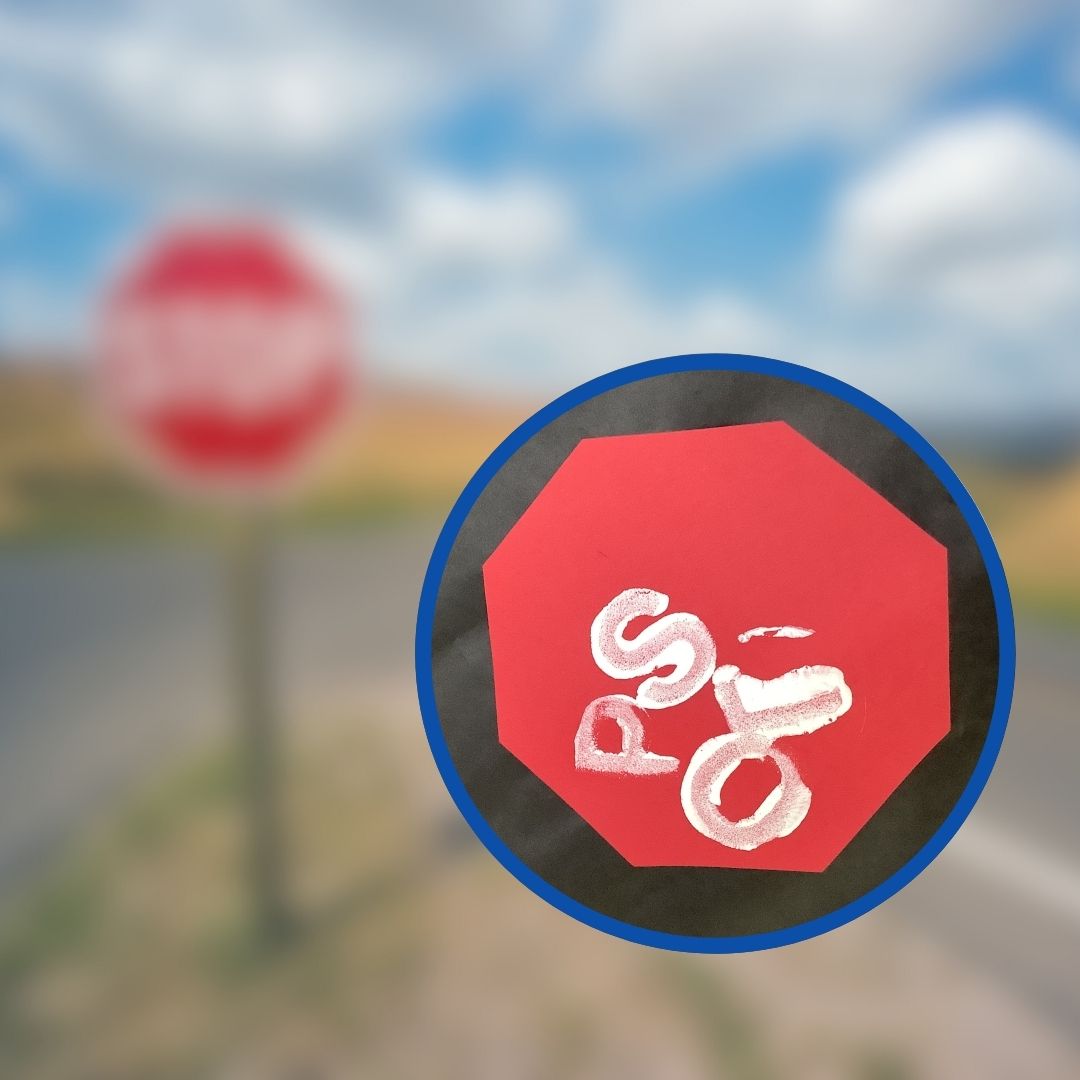

As part of Transportation Week, our preschoolers in Group 1 explored the world of road signs by creating their very own Stop signs—a fun and educational craft that combined literacy, math, and real-world learning.
🚦 Project Overview: Stop Sign Craft
Learning Objectives:This activity helped children learn about common road signs and what they mean. It showed them how these signs are used in everyday life. The kids practiced letter recognition and spelled the word “STOP,” which supported their early reading skills. They also explored shapes—especially the octagon—while enjoying a fun, hands-on stamping activity that built fine motor skills and encouraged creativity.
Time Required: One day
Materials Used:
Red paper (pre-cut into octagon shapes)
Black paper (cut into rectangles for signposts)
White paint
Sponges
Popsicle sticks (for structure and easy holding)
Paper plates (for holding paint)
Step-by-Step Instructions:
-Prepare materials ahead of time by cutting out read octagons and black rectangles.
-Attach popsicle sticks to the backs of the signs to provide support and allow kids to hold them up easily.
-Pour a small amount of white paint onto paper plates.
-Give each child a sponge to dip into the paint and stamp the letters S-T-O-P onto their red octagon in any order they choose.
-Let signs dry before a group discussion about where Stop signs are found and why they’re important.

🧒 Student Engagement
Before the craft, the children read a picture book about street signs and traffic safety together. This helped them learn new words and understand the activity. During the stamping, they explored paint textures and practiced recognizing letters, all while learning how road signs connect to the world around them.

📚 Teacher’s Reflection
Using popsicle sticks on the back made the signs much more sturdy—especially helpful for small hands. The paper plate trick for paint also helped reduce mess while giving just the right amount of paint for stamping.